



Install and adjust your XR receiver hitch
Use the instructions and video below to install the receiver shank and adjust your ball mount. Check the ratings of your complete towing setup before towing.
Here you can download the Shocker XR Receiver Hitch installation instructions – Version 1.2.
Current XR models and installation
SH-XR100 / SH-XR100-10: 2-inch receiver, 12,000 lb GTW / 1,200 lb tongue weight. SH-XR125 / SH-XR125-10: 2-1/2-inch receiver, 16,000 lb GTW / 1,600 lb tongue weight. These limits apply to both 8-hole and 10-hole frames.
Version 1.2, created October 10, 2026. This current-model guide excludes legacy SH-XR130. For that model, follow its original instructions and rating labels or contact our team.
- Match your equipment. Check receiver size, hitch/base labels, attachment and coupler ratings. Park on level ground; support and secure the trailer before adjusting the hitch.
- Install the XR base. Slide the matching shank into the receiver. Align a receiver pin hole and install a 5/8-inch hitch pin with its clip, or a compatible locking pin. Check clearance.
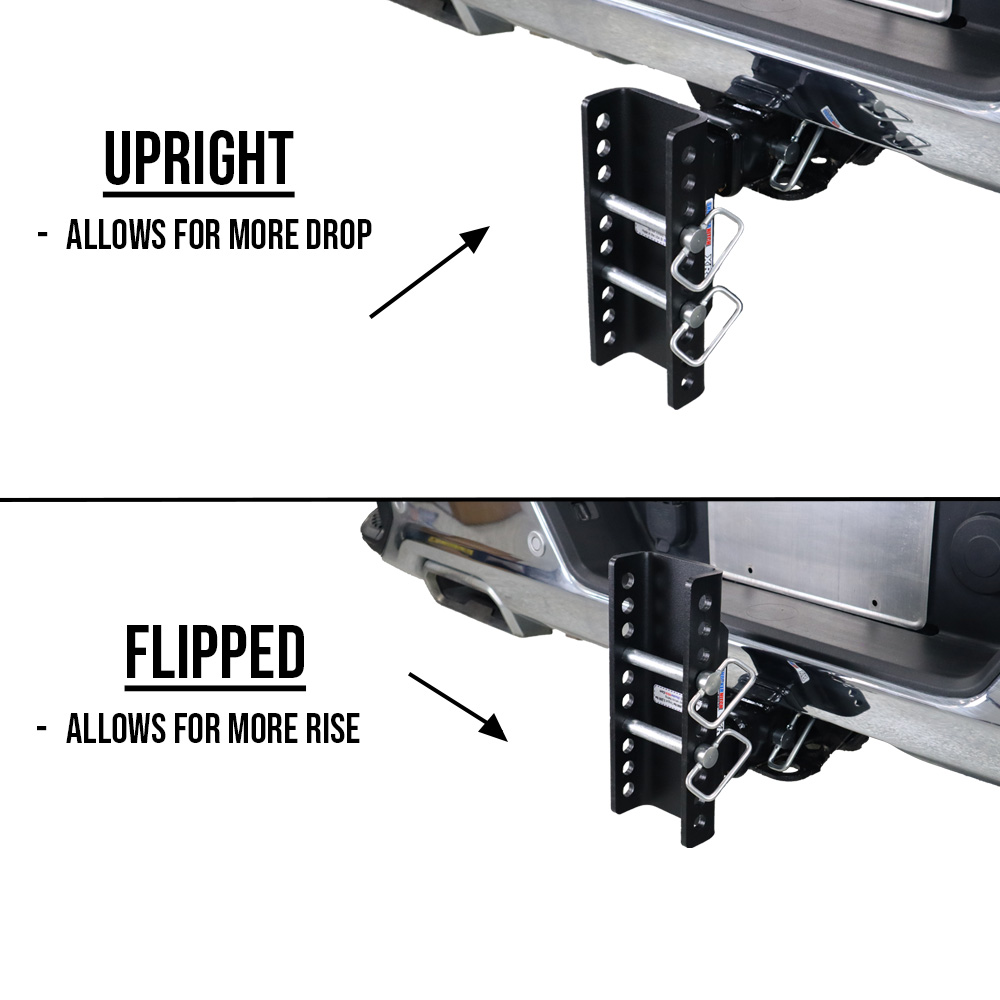
- Set the height. With the trailer supported, select drop or rise orientation. Position the compatible attachment to keep the loaded trailer level. Install BOTH attachment pins and secure both clips/locks.
- Connect and inspect. The trailer coupler must match the hitch-ball size. Latch and secure it. Connect safety chains, breakaway cable and lights as applicable. Check all pins, locks and clearance.
- Maintain. Inspect pins, clips, holes and mounts for wear or damage. Grease the hitch ball as directed by the coupler maker. Follow the separate instructions for pintle or sway attachments.
GTW = gross trailer weight; TW = tongue weight. Do not exceed any applicable rating for the tow vehicle, receiver, hitch, attachment, ball or pintle, trailer coupler or lunette ring, or trailer.
XR Hitch Install Video
Video library: Watch the Shocker XR Adjustable Ball Mounts playlist.
Videos show product features and attachment options. Some clips include older models and ratings. Use the current Version 1.2 instructions and your model labels for installation, receiver size and capacity.
XR attachment drop, rise and capacity
The values below are attachment ratings, not complete XR assembly ratings. A higher-rated attachment does not increase the XR base capacity.
| Attachment | 8-hole: rise / drop | 10-hole: rise / drop | Attachment GTW / TW (lb) |
|---|---|---|---|
| Combo ball* | 4" / 4" | 6" / 6" | 2" ball: 10,000 / 1,000 2-5/16" ball: 20,000 / 2,000 |
| Drop ball* | 0" / 7-1/2" | 2" / 9-1/2" | Same ball limits as combo above |
| Raised ball* | 5" / 3" | 7" / 5" | Same ball limits as combo above |
| Pintle hook SH-333 | 1" / 7" | 3" / 9" | 20,000 / 2,000 |
| Raised pintle SH-335 | 3-1/2" / 4" | 5-1/2" / 6" | 20,000 / 2,000 |
| Pintle & ball SH-334-2/-25 | 1" / 7" | 3" / 9" | Pintle or 2-5/16": 16,000 / 3,000 2" ball: 12,000 / 3,000 |
| Drawbar SH-350 / SH-370 | 4" / 4" | 6" / 6" | 20,000 / 0 (no vertical load) |
| Clevis SH-360 | 1-1/2" / 6-1/2" | 3-1/2" / 8-1/2" | 20,000 / 0 (no vertical load) |
*Sway-tab versions use the corresponding ball-mount limits. Sway arms require compatible mounting tabs; follow the sway-kit instructions. Drawbar/clevis are not for use with hitch ball.
Optional sway-control setup
Have an XR combo, raised or drop ball mount with sway-bar tabs? Those tabs provide the hitch-side connection for a compatible friction sway-control arm. You also need the appropriate connection on your trailer.
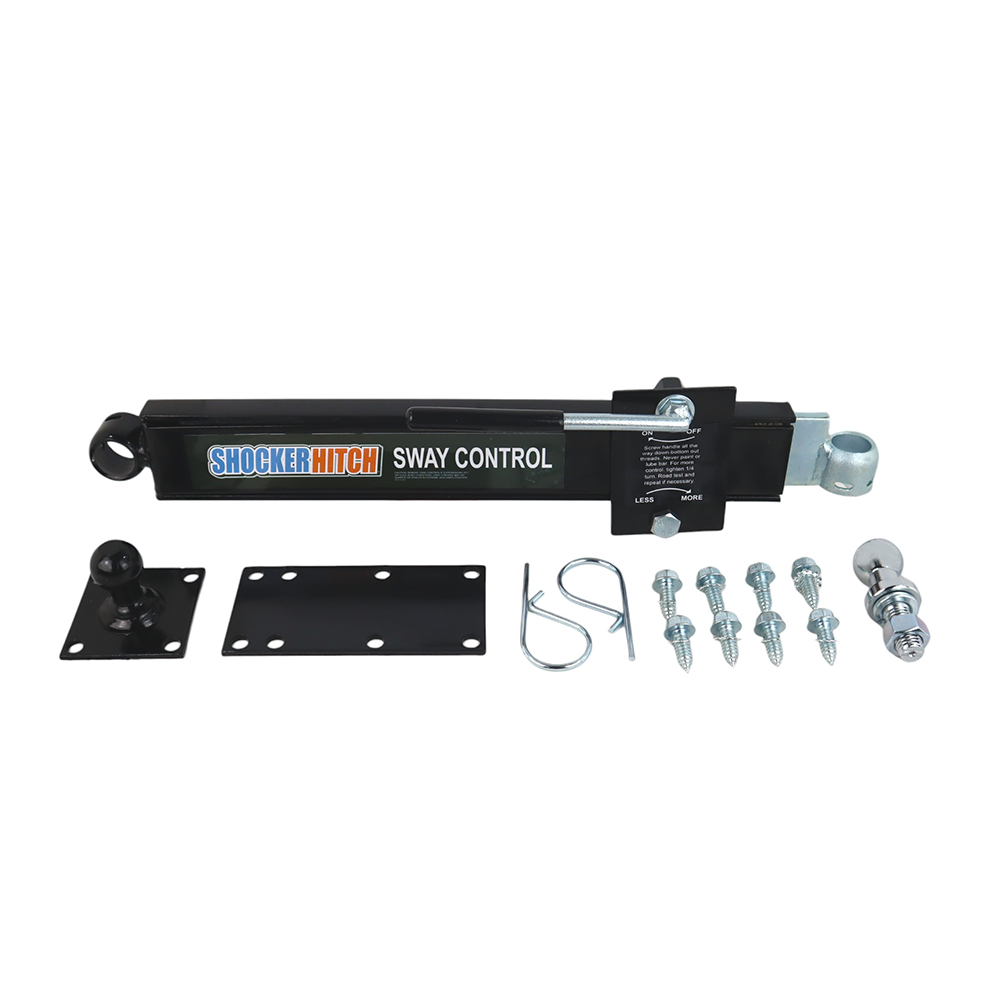
SH-1001
Friction sway-control kit
Start here for installing and connecting the friction sway-control arm between your hitch attachment and trailer.
View SH-1001 installation instructions →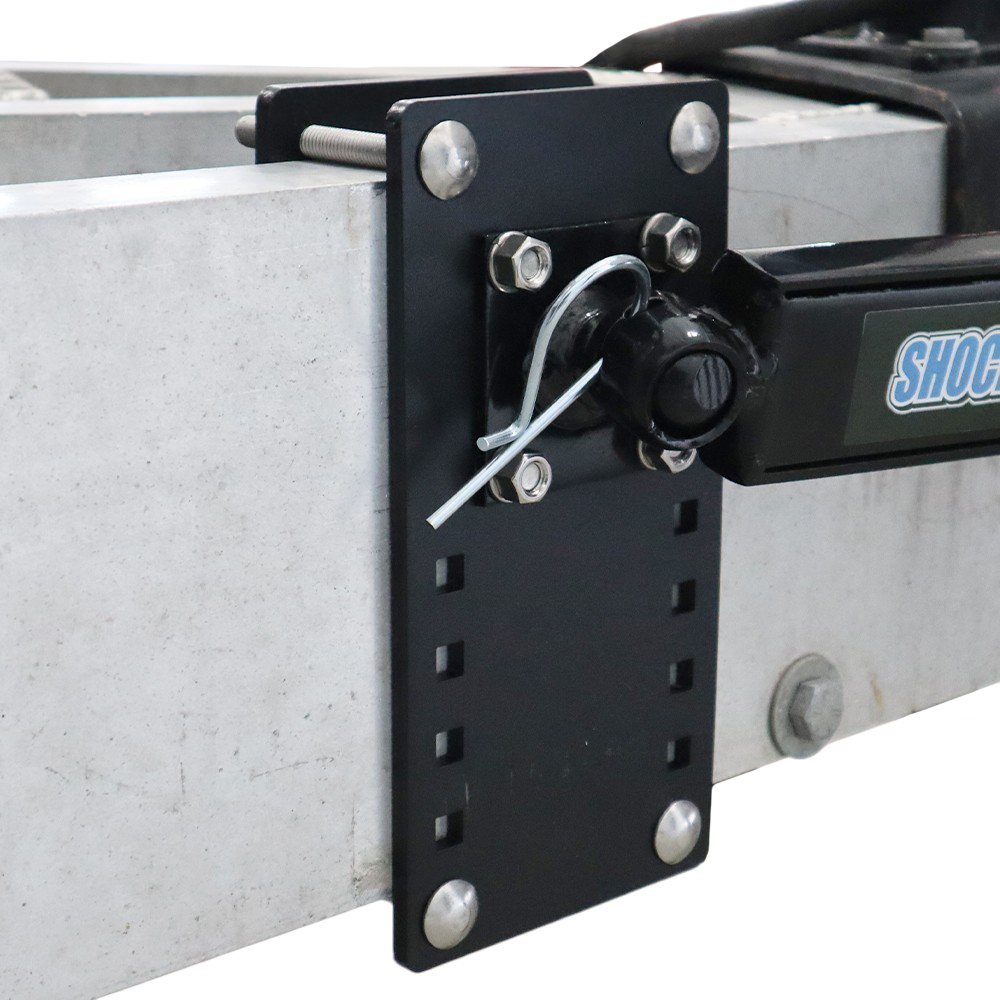
SH-7010
Clamp-on trailer-frame bracket
An optional trailer-side mounting method. Check the guide for frame compatibility and installation requirements.
View SH-7010 installation instructions →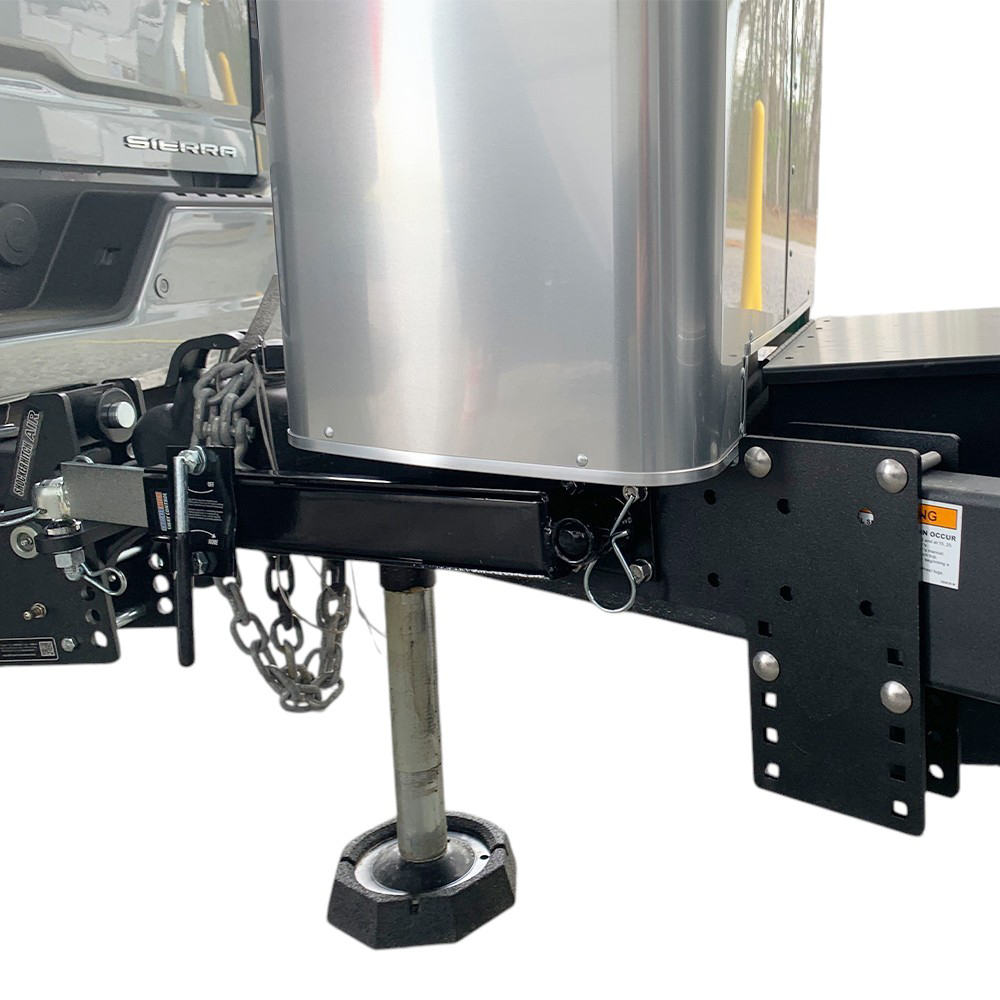
SH-7015
Airstream trailer brackets
For the applicable Airstream installation with two sway bars. Check the current guide to confirm compatibility with your trailer.
View SH-7015 installation instructions →Choose the hardware that fits your trailer—you do not need all three kits. Follow the applicable guide for installation, adjustment and operating precautions.
Replacement pins and receiver hitch locks
- Standard pins with clips: SH-BH625456PR (pair), SH-HP-3Pack (3 pins).
- Clear zinc bullet-style pins with clips: P00476-2Pack (pair), P00476-3Pack (3 pins).
- Standard and bullet-style pins: 5/8-inch diameter, 4-5/8-inch usable span.
- SH-318 receiver locking pin: 3-5/8-inch span. SH-317 attachment locking pin: 4-5/8-inch span. SH-317-2-318: keyed-alike 3-pack.
Confirm pin fit, clearance and lock engagement for your setup. Register your warranty.